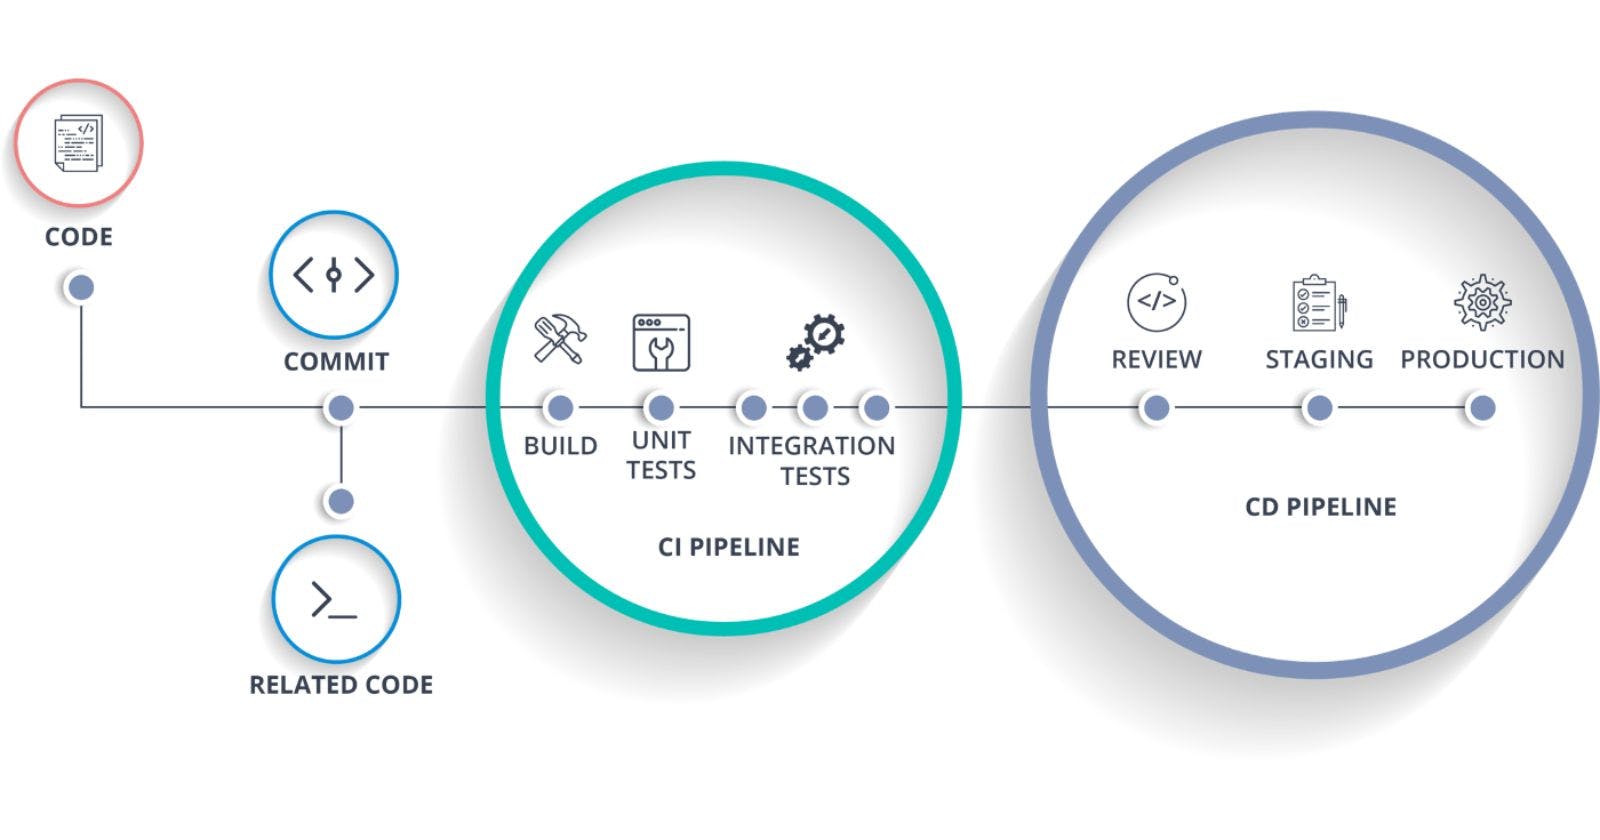
Python Flask Application & AWS tools based, Complete DevOps CICD Pipeline, step-by-step Tutorial


AWS Elastic Container Service + Code Commit (Git) + Code Build + Code Deploy + Code Pipeline+ ChatBot +Application Load Balancer (ALB)
Hi Folks,
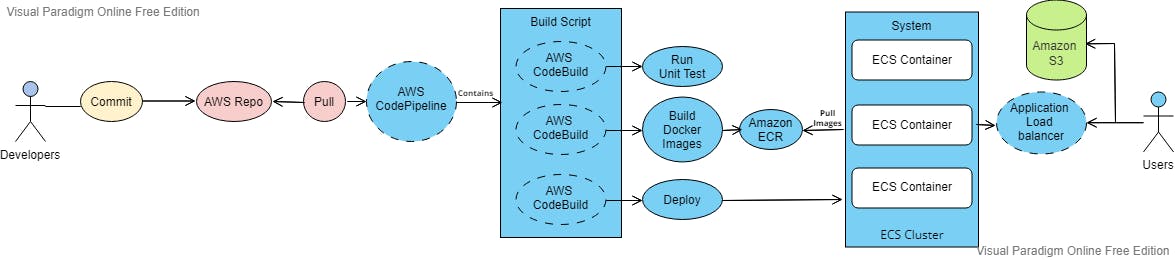
In this blog, I am going to explain the step by step tutorial for AWS ECS and CICD DevOps deployment pipeline with the help of native AWS tools. You can find the Steps below.
So Lets Start …. !
Index:-
Step 1: Docker Basics Step 2: AWS ECR Creation Step 3: Create ALB Step 4: Create an AWS ECS Cluster Step 5: AWS Code commit Step 6: AWS Code Build Step 7: AWS Code Pipeline Step 8: Error & Resolution Step 9: Modify Input Artifacts Settings for Stage Step10: Final Deployment Test and Validation
Step 1: Docker Basics
Create EC2 Instance
Install Docker
Pull centos:centos6
Create index.html
Create Dockerfile
Build a Docker image
#Dockerfile

FROM amazonlinux
RUN yum update -y && yum install -y python python-setuptools python-dev build-essential python-pip python-mysqldb
RUN pip install flask
COPY app.py /opt/
ENTRYPOINT FLASK_APP=/opt/app.py flask run --host=0.0.0.0 --port=80
Step 2: AWS ECR Creation
Create AWS ECR
Login to ECR
Tag existing image as AWS ECR repo
Push the image into the ECR
Step 3: Create ALB
Create Target group
Create ALB
Step 4: Create an AWS ECS Cluster
Create a Task with Fargate Computability
Create a FargateCluster
Create a Service with ALB enabled
Test ALB DNS, whether your site is running or not
Step 5: AWS Code commit
Create a Repo
Set ssh connectivity in your local machine
Push your code into the newly created repo
Step 6: AWS Code Build
Create a Code build Project
Select an Artifact for output
Build your Docker image & push to AWS ECR
#buildspec.yaml

version: 0.2
phases:
  pre_build:
    commands:
      - echo Logging in to Amazon ECR...
      - $(aws ecr get-login --no-include-email --region $AWS_DEFAULT_REGION)
  build:
    commands:
      - echo Build started on `date`
      - echo Building the Docker image...
      - docker build -t demo-doc-repo .
      - docker tag demo-doc-repo:latest 436174799454.dkr.ecr.us-east-1.amazonaws.com/demo-doc-repo:latest
  post_build:
    commands:
      - echo Build completed on `date`
      - echo Pushing the Docker image...
      - docker push 436174799454.dkr.ecr.us-east-1.amazonaws.com/demo-doc-repo:latest
Step 7: AWS Code Pipeline
Create a pipeline Project
Select you Code commit repo as an input repo from step 5
Select Code build project from Step 6
Select Code Deploy for ECS
Select your cluster and Service name from step 3
Crete the Code pipeline
Step 8: Error & Resolution
In the above pipeline, first 2 steps will run successfully
Step 3 deploy will give you an error
For this, you need to Create one “imagedefinitions.json” file and push it to the code commit
The pipeline will run again and you will again get an error on step 3
#imagedefinitions.json

[
    {
        "name": "web1",
        "imageUri": "900765026163.dkr.ecr.ap-northeast-1.amazonaws.com/yogeshwar"
    }
]
Step 9: Modify Input Artifacts Settings for Stage
- Change the input
Step 10: Final Deployment Test and Validation
Push the new version of code in a code commit
It will automatically deploy the new task with the new version
At last, you can run the DNS ALB on your browser
Conclusion:
I have successfully shown you all the steps for AWS ECS cluster deployment and the CI/ CD pipeline using AWS DevOps tools.